TL;DR
A leaning iron fence is usually caused by shifting soil, shallow or deteriorating footings, rusted metal, or physical pressure. Fixing it means identifying the cause, straightening or re-setting the post, and reinforcing the footing — often with new concrete, rust prevention, and better drainage. The more comprehensive the fix, the longer your fence stays upright.
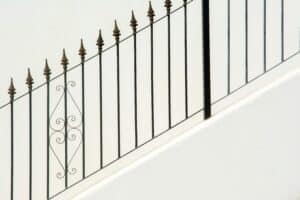
Why Your Iron Fence Might Be Leaning
1. Shifting Soil or Erosion Around Posts
One of the most common reasons an iron fence leans is the ground beneath it literally moves. Sacramento’s clay-heavy soil expands in the winter when it absorbs water, then shrinks and cracks in the hot, dry summer. This expansion-contraction cycle exerts lateral pressure on fence posts and slowly shifts their alignment. For detailed strategies on managing these challenges, refer to our step-by-step guide to installing a fence on a slope.
Additionally, if water tends to pool in your yard — especially after rain or irrigation — the soil around your post may wash out or become too soft to hold the concrete footing. Over time, the post tilts as its base loses support.
How to check for this:
Look for soft or muddy soil near the base, visible gaps between the concrete and surrounding dirt, or slight movement when you gently shake the post.
Prevention tip:
Grade your soil away from the fence line to redirect water. Add gravel trenches or French drains near the base of the fence where water collects. Products like EZ-Drain by NDS (available at Home Depot or Lowe’s) make it easy to add drainage with minimal digging.
2. Shallow or Poorly Installed Footings
Iron fence posts need to be anchored deep — ideally 24 to 36 inches into the ground with at least 6 inches of gravel at the bottom for drainage. Unfortunately, many fences (especially DIY installs or older ones) are set too shallow, sometimes with little to no gravel, making them vulnerable to movement.
Inadequate concrete coverage, improper mixing, or failing to brace posts while the concrete cures are also common mistakes. These lead to a weak base that slowly shifts or crumbles over time.
Signs of poor footing:
Posts that wobble when pushed, or concrete footings that are smaller than 8 inches in diameter or appear cracked or dislodged.
Prevention tip:
Use a post hole digger to ensure proper depth and width. For re-installs, use a product like Quikrete Fast-Setting Concrete Mix and let it cure for at least 24 hours. Add gravel before pouring to allow for proper drainage.
3. Rust and Corrosion at the Base
Even though iron is tough, it’s not immune to rust — especially when moisture gets trapped where the post enters the concrete. This is a common problem when the posts are installed directly into concrete without a rust barrier, or when the fence is not regularly maintained.
As rust eats away at the metal, it weakens the post. Eventually, it may snap at the base or lean under the weight of the attached rails.
How to identify it:
Look for bubbling paint, orange or brown stains, and visible pitting near the base of each post. In some cases, the post may be completely hollow inside even if it looks okay on the surface.
Prevention tip:
Use galvanized or powder-coated posts, and apply a product like Rust-Oleum Rust Reformer annually to exposed metal. If installing new posts, wrap the base with bitumen tape or use post sleeves to separate metal from concrete.
4. Physical Pressure or Impact
Sometimes the issue isn’t in the ground — it’s what pushed the fence. Vehicle bumps (even light ones), falling tree branches, kids climbing on the rails, or vines pulling on the fence can all create enough lateral force to cause a lean.
This usually starts with one post leaning slightly and worsens as the neighboring sections follow.
What to look for:
Bends in the metal, scrape marks from an impact, or lean isolated to a single section.
Prevention tip:
Install low-profile plant guards to prevent vines from grabbing the fence. If a fence is near a driveway or curb, consider a protective post guard or curb barrier to reduce accidental impacts.
How to Fix a Leaning Iron Fence
Each solution depends on the severity of the lean and the condition of the post and footing.
Option 1: Straightening and Bracing (for minor lean)
This is suitable when the post is still solid and the lean is recent. It’s especially useful after a storm or if the soil shifted but the concrete and metal are intact.
Steps:
-
Dig around the base of the leaning post to loosen the surrounding soil, creating room to move it. Use a digging bar or trenching shovel.
-
Gently push the post upright using a level to ensure alignment.
-
Brace the post with 2x4s at an angle, securing them into the ground on either side with stakes.
-
Mix a batch of Quikrete Fast-Setting Concrete. Pour it into the hole around the post, making sure the post stays level. Fill to about 2 inches below grade.
-
Let cure for at least 24 hours before removing the bracing.
-
Backfill with soil and tamp down firmly.
Tools & products needed:
-
Post level
-
2×4 bracing boards
-
Quikrete concrete mix (available at Ace Hardware, Home Depot)
-
Spade, gloves, safety glasses
Prevention after repair:
Apply rust-preventive spray to the base, and check post alignment seasonally. Improve grading if pooling water contributed to the lean.
Option 2: Re-Setting the Post (for moderate lean or movement)
This is best when the post is solid but the concrete footing is failing, too shallow, or loose.
Steps:
-
Detach the fence panel connected to the leaning post. Use a socket wrench or grinder to remove bolts or welds.
-
Break and remove the old concrete footing using a sledgehammer or jackhammer.
-
Dig a new hole at least 24–36 inches deep and 8–10 inches wide. Add 6 inches of crushed gravel or drainage rock to the bottom.
-
Place the post in the hole and brace it with 2x4s on all sides. Use a level to ensure it’s perfectly vertical.
-
Mix and pour high-strength concrete into the hole, keeping it level with the surrounding ground.
-
Allow it to cure for 24–48 hours.
-
Reattach the panel and inspect alignment.
Product tips:
Use Sika Post Fix for fast-set alternative or Quikrete 5000 for heavy-duty applications. Both are available at most home improvement stores.
Prevention after repair:
Seal the base with silicone caulk or metal sealant. Add a gravel trench or compact soil firmly around the edge to avoid future movement.
Option 3: Replace the Post (for rusted or compromised posts)
If the post is rusted through or bent, straightening it won’t work. It needs full replacement.
Steps:
-
Cut out the rusted post using an angle grinder at the weld points. Wear safety gear.
-
Grind the remaining metal clean where the post connects to rails or panels.
-
Insert a new post of matching dimensions and style. Use galvanized steel or a powder-coated wrought iron version.
-
Re-weld or bolt the post into place, matching the original lines.
-
Dig a new footing and follow the re-setting steps above to install it properly.
-
Apply primer and finish paint to the welded joints and entire post to ensure full protection.
-
Optionally, add a post sleeve at the base to shield the metal from soil contact.
Recommended products:
-
Zinsser primer for rusted metal
-
Rust-Oleum Universal Spray Paint
-
Galvanized square or round fence posts (available at metal suppliers or Lowe’s Pro Services)
Prevention after repair:
Paint all exposed welds. Reseal joints annually. Use plastic sleeves or bitumen tape when setting into concrete to reduce corrosion risk.
How to Prevent Your Fence from Leaning in the Future
-
Grade your yard so that water flows away from the fence
-
Add French drains or gravel beds under the fence line to improve water flow
-
Reseal joints annually with outdoor-rated sealant or rust-resistant paint
-
Apply corrosion inhibitors like Fluid Film or Rust-Oleum spray at the base
-
Avoid planting climbing vines or shrubs that put pressure on the rails
-
Use compacted gravel + deep concrete for any new post installation
-
Inspect for small shifts or surface rust every spring and fall
Why Iron Fences Lean More Often in Sacramento
Sacramento’s soil and climate present unique challenges.
-
Clay-heavy soil shifts seasonally, making shallow posts unstable
-
Our winter rains and dry summers cause expansion and contraction cycles
-
Tree roots in older neighborhoods can lift or nudge fence posts from below
-
Many fences built pre-2000s were set too shallow or with poor materials
-
Homes on hillsides or retaining walls often have uneven ground pressure
At Irish Iron, we’ve repaired hundreds of fences affected by these exact conditions.
When It’s Time to Replace Instead of Repair
Repairing a single post makes sense if the rest of the fence is stable. But if you notice:
-
Multiple leaning posts in different areas
-
Visible rust on several fence segments
-
Large gaps between panels and posts
-
Wobble when pressure is applied
-
An older install with repeated problems
…it’s likely time for a full rebuild. Starting fresh with deep footings, upgraded materials, and better drainage can save you money and frustration in the long run.
Not Sure What Your Fence Needs? We’ll Tell You
You don’t have to guess. We’ll come inspect your fence, explain what’s going on, and tell you exactly what needs fixing.
Our Sacramento-based crew specializes in iron fence repairs that last. Whether you need one post fixed or an entire fence replaced, we’ll do it right the first time.